
A lot of crafters (a.k.a. artists) are making "mixed media" wall hangings. I don't know the official definition of "mixed media" but from what I have seen it means to use lots of different materials that wouldn't normally be used together to make a project. For example, use paint, paper, stickers, stencils, tissue paper, and Mod Podge. I have been making wall hangings that have a message. Not just nice words but meaningful words. I have been putting inspirational bible verses on many of my wall hangings lately and thought I would show you. Each of the canvases has 2 coats of matte Mod Podge to protect it from the elements.

This a 10 in x 10 in deep wrapped canvas. I believe I used brown tissue paper for texture, while paint as the bottom coat. For the top coat, I used the Adirondack Brights Acrylic paint in POOL color. The Instagram filter I used made the color look darker blue. One of my favorite verses. My grandma (posted about previously) had horrible twisted feet from arthritis and couldn't wash her feet herself. When I would visit her, I would wash her feet. So this verse is of particular importance to me.

For this canvas, I used a brown tissue paper for texture then I used a purple paint and a Heidi Swapp Hexagon stencil for interest. This canvas is 12 in x 12 in about 1 inch deep. All the rest of the canvases are this size as well. I have lots of letter stickers so spelled out the words I wanted to Romans 12:2a then blotted an orange and white paint on top. Once the letters were fully covered, I pulled them off to reveal the purple paint underneath. I like this because of the different font stickers I used.

This was actually the first bible verse canvas I made. It has white tissue paper for texture, blue/white paint for the base coat. Then I used stickers to spell out what I wanted it to (one of my favorite bible verses for when I am anxious or nervous). I used a gray color paint on top and pulled off the stickers.

This is my most recent canvas. To be honest, it doesn't really fit in with the other canvases. With the ones pictured above, I applied stickers, painted over them and pulled the stickers off to reveal the colors underneath. When I made this canvas, I used tissue paper, black paint, gray paint, and one Christy Tomlinson's She Art Vintage Doily stencil. Once I placed the white letter stickers on top, it just looked RIGHT. For those of you who are spell checking, there is a mistake in the spelling of one of the words. I know what it is, you don't need to point it out to me. In my defense I was spelling backwards and from the bottom to get the look of the right alignment that I wanted.
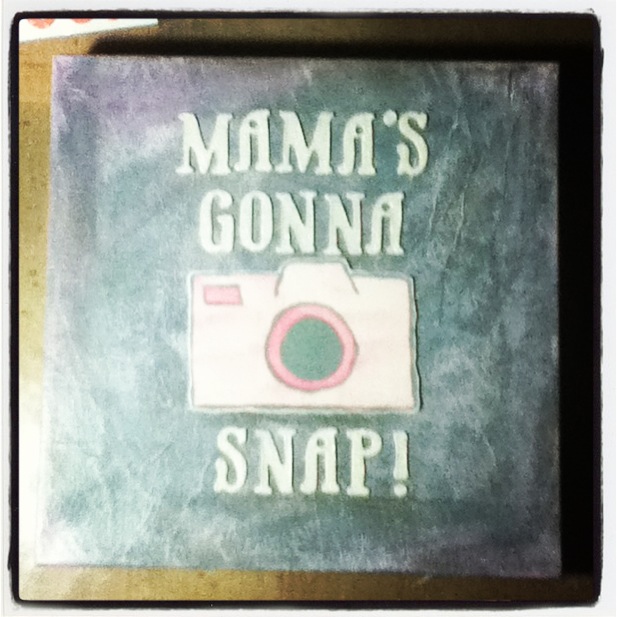
This one was a super fun mixed media canvas to make. It was time consuming in the respect that I wanted to make it perfect so I made it over several weeks. The camera in the middle is a die-cut I made. I sketched a picture of a camera I found online, transferred it to a piece of thick water color paper, then painted it in. The letters, from We R Memory Keepers chipboard alphabet stickers "For the Record" series in this nice off white color. I think it turned out super duper nice.
I made this canvas for my cousin, Jenn Wiemann. She is starting a photography business and a new mom so it just made sense that I would make this for her. To be honest, I did not come up with this all on my own. I check out a lot of craft blogs and one of the many blogs I was looking at one day, I found a really great picture frame wall art with this same idea. If I can find the blog online again, I will post the link here.
Thanks for stopping by. If you like it, let me know.
Emma #1


