Emma Squared Designs

Sunday, April 19, 2015

Cardboard Garden

The other day I was sitting in my apartment wanting to have a garden of my own. See I am on the garden committee at work where we grow vegetables to donate to a local charity called UMOM (they are family shelter) and it got me to thinking about growing my own veggies. I don't have much room for a garden but I have heard of people making "patio gardens" and I thought to myself "Why not?!"
Though I don't have much space I figured I could use what I already have in my possession to make a garden work. I looked over to my right where I have stack of empty boxes (don't ask why) and began to wonder if it was possible to turn an empty box filled with soil into a garden. I searched online to see if there was any reason NOT to use a box to grow a garden and found this website. It gave some good suggestions and tips regarding cardboard box usage in gardens and I am glad I found this website because I used it to inspire me to make this:
How is this a "cardboard garden"? You ask. Well, it is and it was so much fun to make! The wooden box is lined with cardboard and I used two boxes to plant some of the plants I bought that wouldn't fit into the raised garden bed. Here is what they look like: 
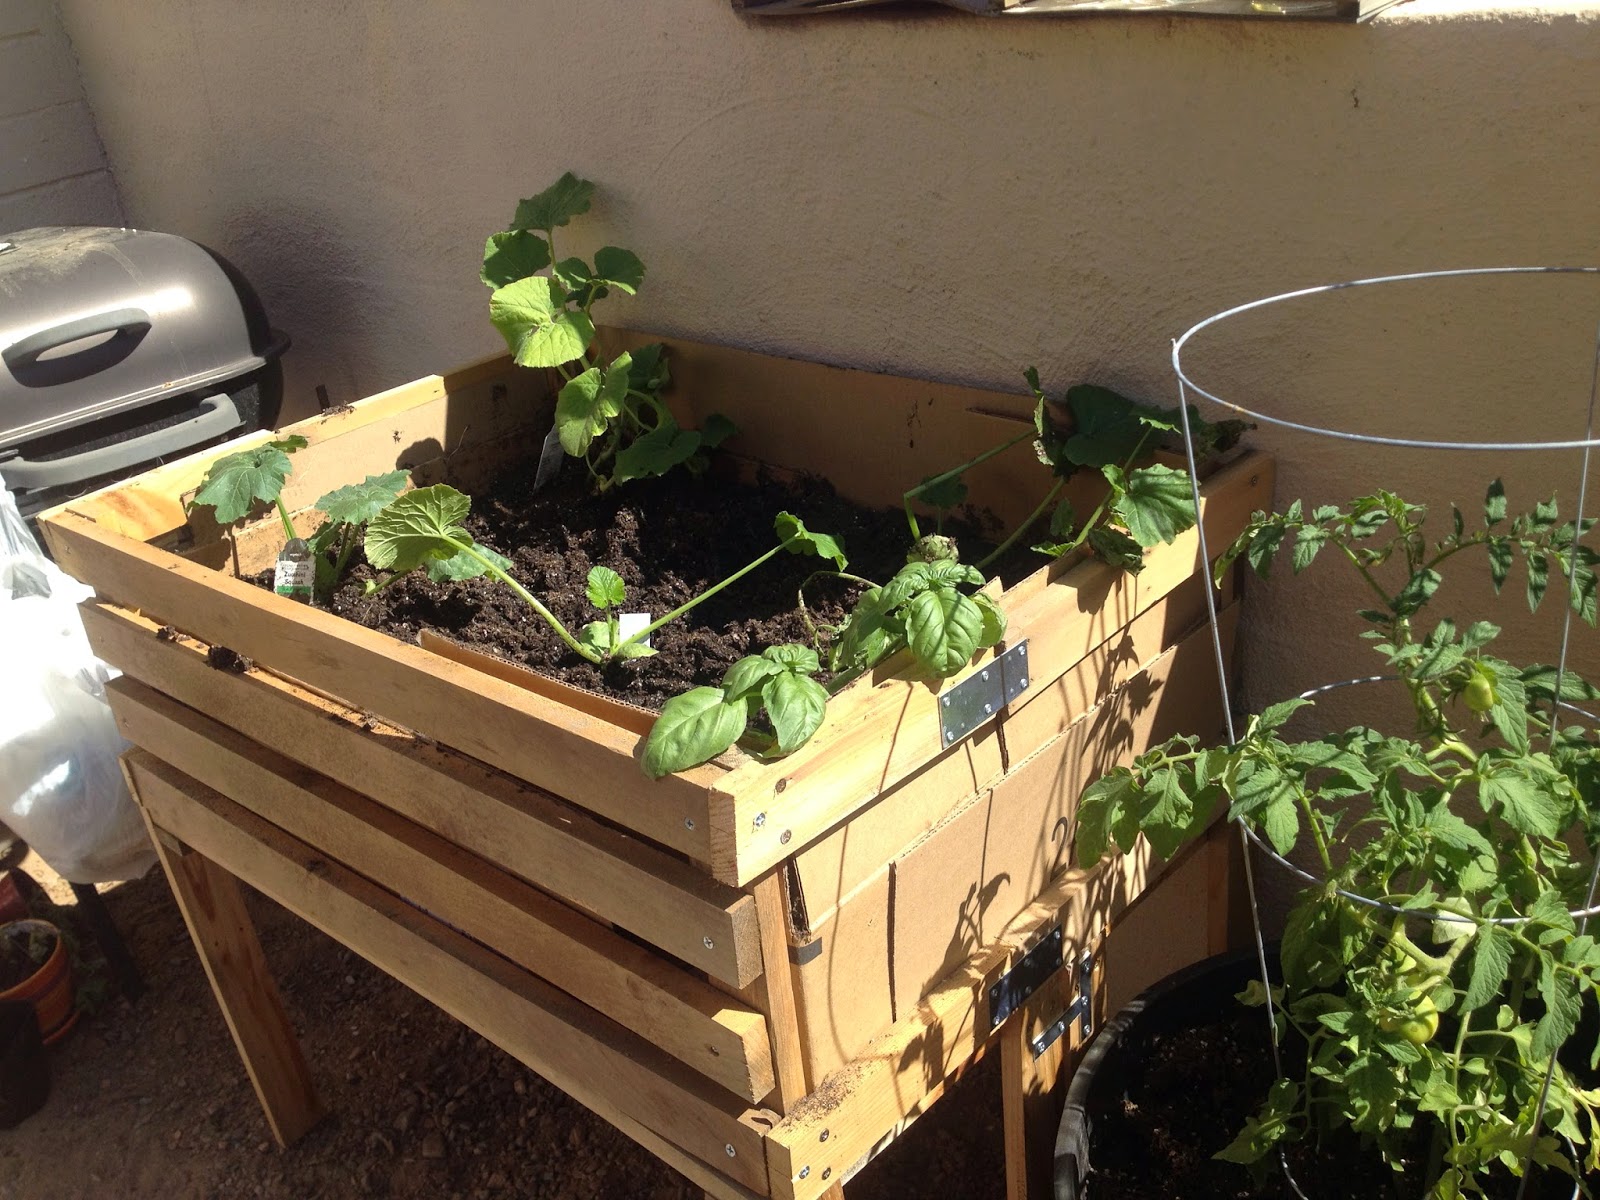
The box on the top is Bush Beans (which are in the legume family and not allowed on Paleo…guess I wasn't thinking clearly when I bought them) and the box on the bottom has two zucchini plants. 
When I was at the nursery, I bought what I thought was cucumbers and zucchinis but turns out I bought 7 zucchini plants!!!! Assuming they produce vegetables, I will be swimming in zucchini by the end of summer!

Now onto the process for making the Cardboard Garden raised bed. 
About seven or eight years ago, while I was living in a different apartment, I went to a local craft store and saw that they had wooden shelves for sale. For years I lugged them around to all my different apartments and used them for craft supply storage but when I moved to my current shoe box (a.k.a. apartment), I had no room for them inside so I put them outside and used it as a holder of junk where they became weathered by rain and plenty of sunshine. When I decided to make the cardboard garden, I looked around for a way to elevate the garden so it wouldn't be on the ground and possibly subjected to Frankie's "business" of lifting his leg or other dog activities. When I looked at my shelves I started to formulate an idea that I think my dad would be very proud of: use what I already have! Talk about reduce, reuse, recycle! All I needed to buy was screws and metal brackets to make my dream a reality. (Sadly, I didn't take pictures at every step of the process but I think you can figure out how the elevated bed came to be.)
Here are some pictures to show the process: 
Step 1: Remove the junk from the shelves: 
Step 2: Cut each leg just above the bottom shelf to make 2 "stands": 
These two "stands" used to be the top of the shelves; they stand about 18 inches tall.
These two "stands" used to be the bottom of the shelves; they stand about 14 1/2 inches tall. 
Step 2: Attach the taller stands together with metal brackets (No picture, sorry)
Step 4: Cut the legs of one of the shorter stands down by 5 1/2 inches and then attach the legs end to end with metal brackets to make a cage. (No picture, sorry again)
Step 5: Place the stand cage on the 18 inch tall stands and attach with metal brackets. (There is a lot of metal holding these rickety shelves together and one day I think the only thing that will be left are those metal pieces!)
If you notice the metal plates on the side of each leg, that is what I did in step 4. 
Step 6: Place where it will live and line with cardboard (hence Cardboard garden):
According to the website where I read about cardboard gardens, it said that cardboard is a great material to use for gardens because it will allow the water to drain out of the soil and provide a breathable environment for the roots of the plants. 
Step 7: Fill with soil (I bought 2 large bags of organic soil from the nursery around the corner):
Step 8: Wet the soil to prepare it for the plants and then place the plants in the desired locations: 

There you have it…my cardboard garden. 
What I have planted in this box is Black Beauty Zucchini, Basil, Spaghetti Squash, and Dark Green Zuchinni. (yes, I am insane for having so much zucchini and I will be taking some to work but what can I say? I love zucchini!)
I will be making signs for each of my plants so I will remember what the heck I planted!
Two more things: 
1) There was blood shed (and plenty of sweat) in the production of this box…I thank the stupid palm tree for this unprovoked attack on my innocent pinky: 

2)I can't end this post without mentioning dear Frankie boy who has a very nice shaded hiding spot: 
Oh and that green plan off the right of Frankie? That is the first addition to my garden, the plant that started it all: "Early Girl" Tomatoes! 
YUMMY!!!
Thanks for stopping by, 
Emma #1

Friday, January 9, 2015

The Resist Technique

I am not an expert crafter and I don't do video tutorials, yet. But I mentioned in my last blog on Christmas cards that I would show you how I do the "resist technique". So here it is.

The idea of resist is to keep some parts of the paper the original color while allowing ink or paint to color the other parts of the paper. There are many videos on the internet that you can see the resist technique and mine is not unique but it is how I do most of my resist cards. In this first picture, I used green embossing powder on white watercolor paper. In the pictures below demonstrating the process, I used clear embossing powder on white watercolor paper. Watercolor paper is usually thicker and has a texture to it, compared to card stock. Card stock will work for this technique too but if you add too much water, the card stock warps and is harder to use. The watercolor paper I am using is a 140 lbs paper designed to take a lot of water.


Emma #1's Ink Resist Technique: 

Here's what you'll need: 
Large background stamp - I am using Hero Arts Leaves, Branches, and Berries
Watercolor paper or thick card stock - in this case, I chose to make the paper slightly smaller than my card base. The paper is 5" x 4".
Embossing ink pad - I use the VersaMark WaterMark pad
Embossing Powder
Ink - I am using Ripe Persimmons and Mowed Lawn Distress Ink from Ranger
Water sprayer
Some sort of water resistant sheet to work on
Step 1: 
Ink up the background stamp of your choice with embossing ink. It is actually a glue not ink.
 Step 2: 
Place the paper face down on the stamp, making sure not to shift it once it is laid down. 
Place a piece of scrap paper over the top and either rub with your hands or take a brayer and roll it over the paper. This will ensure the pattern is stamped all over the paper. 
 Step 3:
After you remove the paper from the stamp, carefully hold at an angle and pour the embossing powder on the face of the paper. 
As you can see in this picture, the powder should only stick to the paper where the glue from the VersaMark pad is. In some cases, you may find that the powder, which is very fine, will stick to the paper in places you don't want it to. To avoid this, you can either rub your paper before hand with a dryer sheet or buy a small cloth pouch that is filled with corn starch from the craft store. Sometimes they are called "Embossing Buddy" but I don't remember what mine is called; it is an off-brand. 
 Step 4:
Tap off any excess embossing powder and place on a scrap piece of paper. I usually hold the paper up off the table but couldn't in the picture because I have only two hands. 
Move the HeatIT Craft Tool around the paper so you aren't concentrating only one spot. If you heat it too much, the paper will start to burn. 
Once you see all the powder has melted and is now shiny, you are done heating it. Set aside for a moment to cool. 
 Step 5:
With the ink pad, tap it on the waterproof sheet 2-3 times to get some ink on the mat. If you are making more than one card at a time, you can add more ink to mat. 
Spray the ink on the mat with 3-4 sprites from your mister. Don't add too much water, just enough to see it start to bead up. 
Step 6:
Place your watercolor paper embossed side down, covering as much or as little as you wish. 
In this case, I only wanted one side to have the solid green on it so I laid it down, picked it up, then laid it down in a few more small places. 

Step 7:
With your HeatIT Craft tool (or any heat gun) dry the ink completely. 
Then repeat with the next color. 
Color Warning: 


You will also want to know your color combinations because the distress inks are "reactivated" once they get wet so even though I dried the green completely, when I added the red next, the area where the colors mixed turned slightly brown. If you don't want that brown color, you will need to use only one color ink for this technique or chose colors that make a nice color when mixed, like blue and yellow makes green. (In the picture on the right, there is a tag that has the red and green ink as well. I used that tag to pick up the rest of the ink off the sheet so nothing would go to waste. 

Step 8:
Once the paper is completely dry, you can wrap vellum about a half inch up from the bottom and adhere with tape on the back. Then adhere to the card base with quarter inch boarder on each side. 
And there you have it. Emma #1 Ink Resist Technique card. Hope you have the opportunity to make a few cards.

Emma #1