Emma Squared Designs

Tuesday, December 30, 2014

Christmas Cards 2014


Now that I have completed all my Christmas cards for this year, most of them mailed AFTER Christmas, I thought I would write about the cards I made and maybe even show a few "trade" secrets.                                       Here are the three basic cards I made.
This one used a large background stamp from Hero Arts called Leaves, Berries, & Branches. I used VersaMark Watermark Stamp pad (from Tsukinedo, Inc) and Stampendous! Embossing Power in White, on black paper to make the beautiful background. Then I used the SpellBinders Holiday words to die cut "Merry Christmas" in shiny red paper. I used the Xyron 1.5" Create-A-Stamp maker to attach the words to the vellum. The vellum is attached to the paper using the Tim Holtz Tiny Attacher. I made several various of this card using water color paper and the "resist" technique. I will explain about that later post. 
For this card, I used the Paper Smooches "Squared" die to make the background. (For all the die cuts, I used my Cuddlebug by Cricut. I broke the new machine I bought in June so I had to go back to my old machine I have had for 5 years.) The swirly Christmas tree is the Penny Black Twirl Tree die. For the different card variations, I used both solid papers, like this one, and patterned papers. I think in the end, I like the solid paper over the pattered paper…especially when you add the tree on top.
This style card was my absolute favorite! The beautiful snowflake was a die from Penny Black called Stellar. It turned out beautiful with the shiny paper, as shown here. But I also used regular white & black cardstock from the local department store and that turned out really nice too. One thing I decided I really liked to do was take my VersaMark Watermark stamp pad, cover this snowflake was (this is glue like product you can use to make a watermark on paper or use for adding embossing powder to give it a nice shiny look), and apply either white or transparent powder. That turns any ordinary, mat paper, into a nice shiny surface. There are some pictures of that too. Once I learned how to use this wafer-thin die properly (lots of paper went directly into the trash, lost as casualties, before I finally worked out the cutting process), this because the simplest and most elegant card to make. I used JudiKins Diamond Glaze to attach the delicate die to the background paper. In most cases I used a solid paper but in some cards, see below, I used simple pattered paper.

For these three cards, I first stamped the watercolor paper with VersaMark Watermark Stamp Pad and covered the paper with embossing powder. I heated it up with my Ranger Heat It Craft Tool and once melted it becomes resistant to inks or watercolor, hence "resist technique". For each of these cards, I used various Tim Holtz Distress Inks. The red color is "Ripe Persimmons", the blue was "Chipped Sapphire" and the aqua color was "Peacock Feathers". They are all beautiful colors and easy to use. 

Here are some variations of the "squared" cards I made. For the card on the left, I took watercolor paper and painted the colors using my watercolor set. The Christmas tree stamp is from Stacey Yacula Studio through Purple Onion Designs. The card on the right is basic white, green, red, and yellow paper and the sentiment, from Hero Arts, called Joy To All, is stamped on vellum.
Now on to my favorite cards. The Stellar die from Penny Black is fantastic! It is details and once I learned how to use it in my Cuddlebug, I could crank one out in a very short time. If you want some direction on how to use wafer thin dies in a Cuddlebug, you can search Youtube for videos; I found that very helpful. I won't go into too much detail here about it, it would take way too long. I will tell you that there are two tips I found very useful: 1)place the die cut side up, not down; 2)either rub the cut side of the die with wax paper or place a piece of wax paper between the die and the paper you are cutting. It makes it a lot easier for the paper to release from the die.
 

This is probably the longest post I have ever written for Emma Squared Designs so I hope you made it this far. If you have any questions or comments, please let me know.

Also, I have one more tip for everyone: START MAKING YOUR CHRISTMAS CARDS IN JULY! I should have known better but I made over 100 cards starting December 17th! Yes, I am that person...The final card was made on December 29th and mailed on December 31st. So learn from my example!

Emma #1

Monday, August 4, 2014

Gift Ideas...

So the other day I was sitting at Chipotle with my family, took a drink out of the cup, and had an epiphany: make a journal out of the cup!
This is how my mind works. I don't always understand it but I go with it when it happens.
So to further my craft making skills, I turned a cup into a journal:
 It may not look like much in a picture but I think it turned out great! The large cups from Chipotle are perfect for something like this because they have different sayings on them and they are rather entertaining.
The journals turn out to be 1/4 inch thick and I found that a total of 30 sheets of paper to make 60 pages (front and back) was just right. I sew the pages into the cup with waxed dental floss…mint flavor!
 Here a journal made out of a Starbucks cup and sleeve. I found the sleeve is a great addition. At first I was going to cut the sleeve open and glue it to the cup so it was permanent but in the end, it works great to keep the journal closed!
I have also made journals out of pint sized ice cream containers and a large ice cream container. The large ice cream container is actually a water color journal for a friend; the pages are made from watercolor paper.
I think this combines my creativity and use of items that would otherwise end up in the landfill…SCORE!
If you decide to make a journal or two, post a picture in comments.
Emma #1

Saturday, April 26, 2014

Doodle Cards

A while ago, a friend of mine who works with a great organization called Phil's Friends, offered me the opportunity to make cards to send to people fighting cancer. When I agreed to send a card weekly to people I have never met, I decided I had to make something special. I had just learned a few doodling techniques from a creative artist and fellow crafter, Dyan Reaveley, and thought I would use that new doodling to make a set of cards. On each card, I also added a bible verse then mailed one each week for four weeks. I called the cards my puzzle cards. They were fun to make and I hope the recipients were happy with them (I made two sets of cards).
This is the first step: to draw the designs then color them in. On this card, I actually used my nifty water color set and even though the paper was just basic card stock paper from Wal-Mart, it didn't warp that much at all! I think it turned out really nice. 

Next I cut the 8 1/2 x 11 paper into quarters. This makes each piece 5 1/2 x 4 1/4. This is the size of a standard card. 

 Then I added the bible verses and adhered each piece onto a standard white card. Easy, right? Well, a little time consuming but I think it was totally worth it. 


Hope you enjoyed looking at the cards and I enjoyed making them. I might even make some more some day but now I al trying out some new crafting techniques.
That's all for now.
Happy Crafting,

Emma #1

Friday, June 14, 2013

Painted Canvas with a Message

A lot of crafters (a.k.a. artists) are making "mixed media" wall hangings. I don't know the official definition of "mixed media" but from what I have seen it means to use lots of different materials that wouldn't normally be used together to make a project. For example, use paint, paper, stickers, stencils, tissue paper, and Mod Podge. I have been making wall hangings that have a message. Not just nice words but meaningful words. I have been putting inspirational bible verses on many of my wall hangings lately and thought I would show you. Each of the canvases has 2 coats of matte Mod Podge to protect it from the elements. 
This a 10 in x 10 in deep wrapped canvas. I believe I used brown tissue paper for texture, while paint as the bottom coat. For the top coat, I used the Adirondack Brights Acrylic paint in POOL color. The Instagram filter I used made the color look darker blue. One of my favorite verses. My grandma (posted about previously) had horrible twisted feet from arthritis and couldn't wash her feet herself. When I would visit her, I would wash her feet. So this verse is of particular importance to me. 

For this canvas, I used a brown tissue paper for texture then I used a purple paint and a Heidi Swapp Hexagon stencil for interest. This canvas is 12 in x 12 in about 1 inch deep. All the rest of the canvases are this size as well. I have lots of letter stickers so spelled out the words I wanted to Romans 12:2a then blotted an orange and white paint on top. Once the letters were fully covered, I pulled them off to reveal the purple paint underneath. I like this because of the different font stickers I used. 
This was actually the first bible verse canvas I made. It has white tissue paper for texture, blue/white paint for the base coat. Then I used stickers to spell out what I wanted it to (one of my favorite bible verses for when I am anxious or nervous). I used a gray color paint on top and pulled off the stickers. 

This is my most recent canvas. To be honest, it doesn't really fit in with the other canvases. With the ones pictured above, I applied stickers, painted over them and pulled the stickers off to reveal the colors underneath. When I made this canvas, I used tissue paper, black paint, gray paint, and one Christy Tomlinson's She Art Vintage Doily stencil. Once I placed the white letter stickers on top, it just looked RIGHT. For those of you who are spell checking, there is a mistake in the spelling of one of the words. I know what it is, you don't need to point it out to me. In my defense I was spelling backwards and from the bottom to get the look of the right alignment that I wanted.

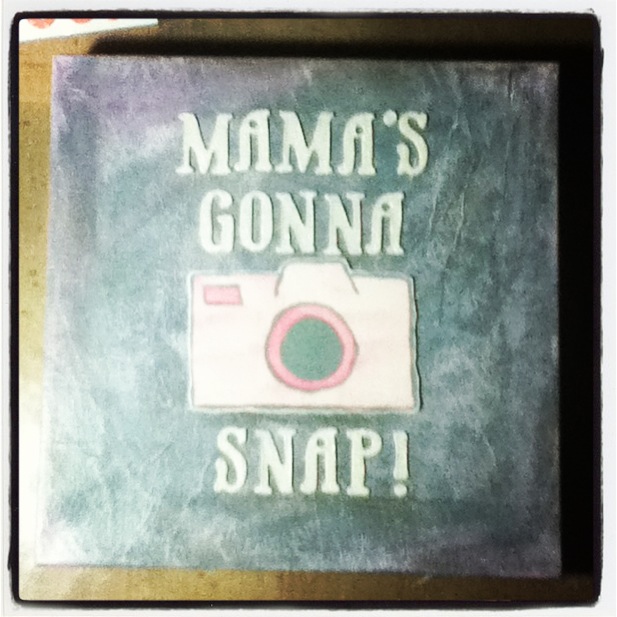
This one was a super fun mixed media canvas to make. It was time consuming in the respect that I wanted to make it perfect so I made it over several weeks. The camera in the middle is a die-cut I made. I sketched a picture of a camera I found online, transferred it to a piece of thick water color paper, then painted it in. The letters, from We R Memory Keepers chipboard alphabet stickers "For the Record" series in this nice off white color. I think it turned out super duper nice. 
I made this canvas for my cousin, Jenn Wiemann. She is starting a photography business and a new mom so it just made sense that I would make this for her. To be honest, I did not come up with this all on my own. I check out a lot of craft blogs and one of the many blogs I was looking at one day, I found a really great picture frame wall art with this same idea. If I can find the blog online again, I will post the link here. 

Thanks for stopping by. If you like it, let me know. 

Emma #1

Saturday, June 8, 2013

Photo Album with a twist


Hi everyone (or my one follower),
It has been a LONG time since I posted and that is for many reasons including but not limited to: I ran out of photo memory available on my blog. I had to delete a bunch of pictures and didn't do it until now. So I made the decision to finally delete the photos I had in memory from my first trip to Israel. I deleted them because 1)I wasn't posting them on this blog and 2)I will be going back to Israel and taking a ton more pictures!
Now on to the photo album with a twist:
It looks normal, I understand, but it's not. You know those "photo albums" that you buy at any store for a couple of dollars and it holds 24 to 36 photos. I cut the covers (front and back) off, made my own cover (see above) and sewed the photo sleeves into the book. Here's some more pictures to give you a better idea of what I did:
First, on my craft sheet, I rubbed six different colors of Tim Holtz Distressed Ink (colors were, left to right, Vintage Photo, Mustard Seed, Peeled Paint, Spiced Marmalade, Stormy Sky, and Bard Door), then I sprayed the ink with water. (Before doing this, I cut water color paper to the desired size and stray with water.) Next, I played the slightly wet water color paper face down on the row of color and let it sit for a few seconds. When I pulled it up, it looked like this: 
Once it dried, I cut chip board in three pieces to make the front, spine, and back of the album and glued it on the "wrong" side of the water color paper. (For the inspiration and directions on how to make a book cover like I did, you can check out Tricia Morris of Club Scrap video.) 
I didn't take pictures of the cover I made before sewing in the pages so here is a picture of the spine with the stitches. If you notice, the cover is shiny rather than dull. I coated it with Krylon Triple-Thick Crystal Clear Glaze. I used it first when I painted mason jars and wanted to be able to use the glass jar without the paint scratching off. I think I sprayed the book with three or four layers of the glaze, letting it dry each time between layers. 
Now on to the cool cut-out on the cover (seen in the next picture on the lower right side of the picture), it is from Paper Smooches I heart art stamp set. I used heat embossing and Faber-Castell PITT Artist Pen Big Brush markers to color it in. 


This is what the inside pages look like. I used waxed linen thread and I like how it looks on the spine.
So there you have it, a post of a photo album I made. I have done several of them in the last year and those who have received them as presents really liked them. I made one for my grandparents for Christmas and said "When it is full, let me know and I will make another one for you." and they took it to heart! I have made two for them and will probably have to make another by the fall. I don't mind. They are super fun to make and quite easy.
Thanks for stopping by.

Emma #1

Sunday, September 23, 2012

Chair and organization

****This post was originally written over 3 weeks ago. When I wrote it, I still had my big, beautiful, comfy chair...covered by a sheet and hidden under a ton of stuff. I have since SOLD the chair!!!******

My apartment is small, about 450 square feet. 
I am a pack rat. 
Do I need to say more? 
So I am trying to downsize.  
In my quest for making my apartment more livable, I have decided to sell a few things. I had a yard sale in July that netted a whole $25...loser of a sale.
Part of my quest involves getting things to make my apartment a little less...well, better organized. 

The first step in organizing is my crafts: 
These colorful baskets were 69 cents each at GoodWill and a little bit of spray paint and voila!
The red basket was a little more expensive at 79 cents...
Though it looks like I am making small changes in my quest for organization, every little bit counts. 
So if you have some suggestions on how to organize a little better for SMALL spaces, let me know. I could use all I can get!

Thanks...
Emma #1

P.S. I have craft stuff for sale. Here's some pictures for ya. Let me know if you are interested in buying any thing. 

Table and an apology

Hi Everyone (my one follower really...)
I am sorry I have been away so long. I have been busy doing all sorts of things like organizing my apartment, studying for a big test, making crafts, failing that big test, and making more crafts. Exciting stuff. If you were all here! 
I have some pictures for you. These pictures are of my new table project. My brother had a table from somewhere that is very sturdy and the perfect size for a small place. My mom has had it for the last couple of years and then finally gave it to me. I have been following a couple of blogs about home improvement type projects and was inspired! See HERE and HERE for some of my inspiration. These two ladies of the blog world are really talented! I am so thankful I stumbled on the blogs. 

This is what it looked like when I started. (see Frankie under the table? He is clean cut - looks like a little professor. What a cutie!)
This is what the table looked like after I "sanded" it. Most of the original top peeled off years ago so it has had a rough top for a while.

This was the first attempt at creating a top worthy of my craft table. I bought a pack of pattern paper at Michael's for ONE CENT...You read that right! One center, it was on deep discount. the paper was too thick and rather clumsy. I ended up pulling it off because it just wasn't going to work. 
Next idea was to paint it. So I used white paint and used about 3 layers to cover up the original top of the table. I knew that wouldn't be the final top but a nice base to do something else. After I let that dry for two days, I decided it was time to make a decision on what to do with the table. 
I have been collecting tissue paper of all kinds for a while and didn't know what to do with it so when I needed to cover up the paint, color tissue paper was the answer...Voila!
Yup. Lookin' good. 
But that wasn't the end of it. I wanted something else on top and this is what I did: 
Yes, a McCalls pattern!
After a five layers of Polyurethane, we come to this:
So there you have it. My new craft table. When I finally finish rearranging my living room to my liking, this will be my primary table for doing work. It is durable, big, and sturdy. For now, it will be a good place to put my stuff as I organize. Oh, the final note is that the plastic guard was originally a dingy, beat up black...now it is Sage by Krylon. Lookin' GOOD!

I enjoy these kinds of projects. I should do them more often. Too bad I live in a shoe box, there is no room for more furniture projects. 

Enjoy the picture and let me know what you think of my newest project. 
Emma #1